


TechSauce is reader-supported. When you buy through links on our site, we may earn an affiliate commission. Learn more
Navigation
Overview
When I was building my house, my builder offered all kinds of ways to turn my house into a smart home. This included fancy dashboard panels in the kitchen, smart alarm systems, automated lights…the list goes on. The builder wanted thousands of dollars for each of these gadgets. They are not only difficult to install, but they’re completely locked down. Many large smart home or automation technology providers do not give the end user access to make changes. This meant I was permanently locked into their ecosystem, meaning I would need to pay the company to come back any time a change needed to be made. It was also possible that the company responsible for the technology would not exist one day, leaving me with expensive paper weights all over my home that just don’t work. So of course, I declined and went with dumb switches, a simple alarm system, and no fancy bells and whistles.
However, it turns out that having a smart home isn’t just for the wealthy or the IT professional with 100 certifications. You too can automate many functions of your house and turn it into a smart home. It all starts with two words: Home Assistant
What is Home Assistant?
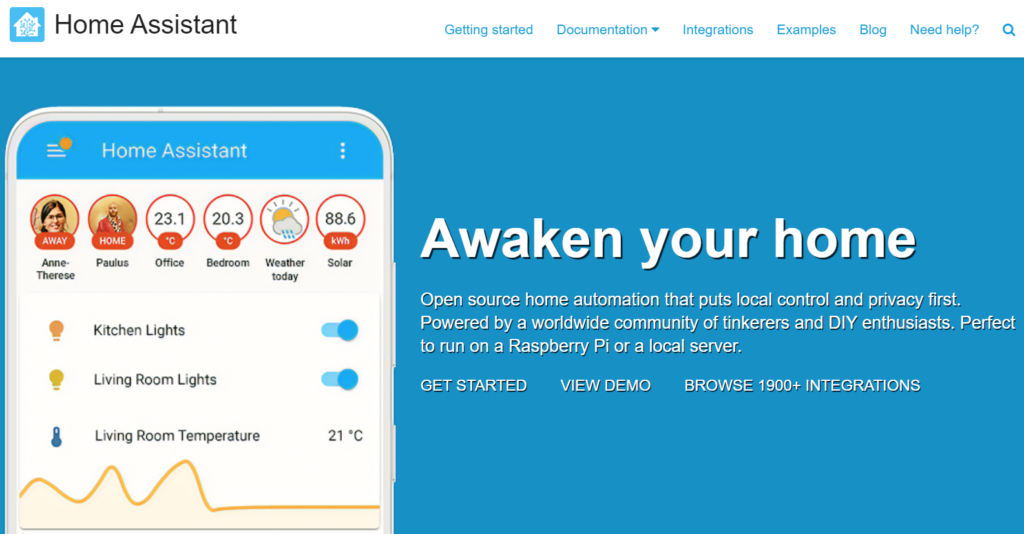
Home Assistant is a fully open source automation tool that is free, runs locally (no internet connectivity required), and supports thousands of off-the-shelf devices such as switches, alarms, cameras, sensors, light bulbs, and many many more. You can find the full list of officially support integrations here, though there are many more that are very simply “plug-and-play”. The enthusiast community that supports Home Assistant is very large and supportive with new DIY users. Home Assistant is the gateway to turning your house into a smart home. It has excellent documentation as well, making the knowledge barrier to entry pretty low.
Choosing your Platform
Home Assistant is extremely versatile and is very easy to install on your platform of choice. We highly recommend installing it on a dedicated system, although you certainly don’t have to. A great way to do that would be to buy a Raspberry Pi but those are quite expensive at the time of writing due to major supply shortages. Alternatively, there are great mini-PCs such as the Beelink MiniS that would be great for Home Assistant and is very affordable.
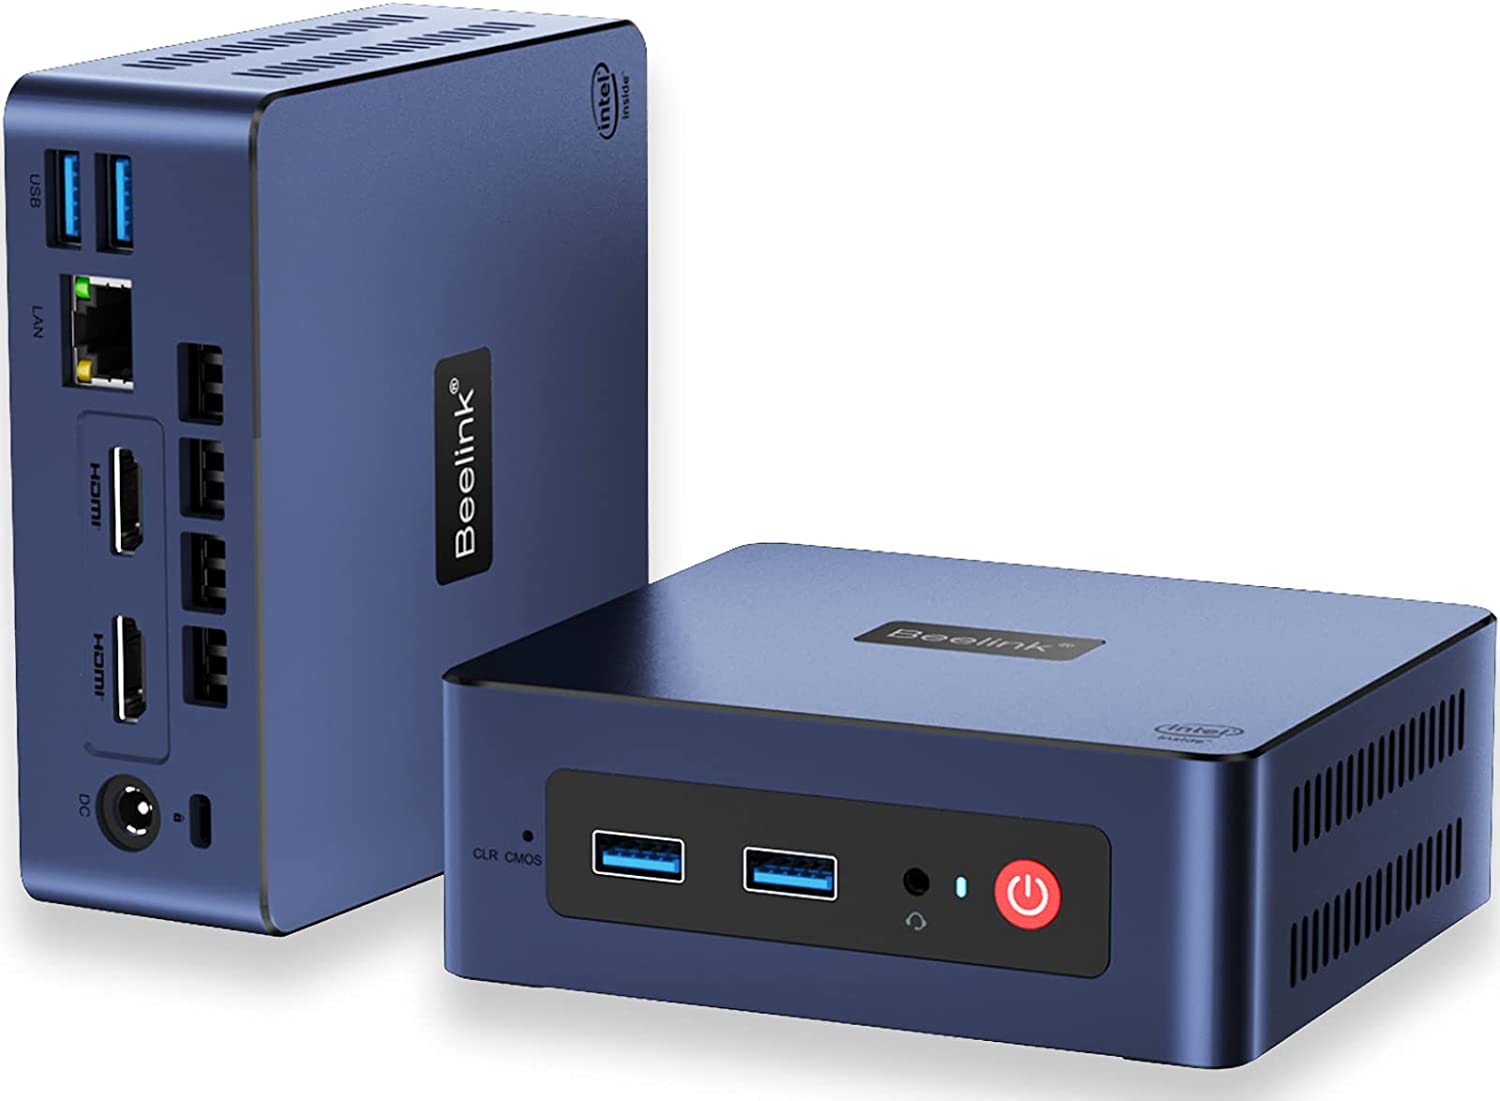
This Mini PC is extremely powerful, affordable, and makes it very easy to get into Home Assistant to start creating your Smart Home!
There’s also the option of running Home Assistant in a docker container or in a virtual machine if you’re familiar with how to do either of those. The documentation for home assistant is extremely easy to follow and can suit a wide variety of needs depending on what hardware you have or is available to you at the time. Other platforms such as unRAID are very popular in homelabs and natively support docker containers, which home assistant can be deployed on (which here at techsauce, we use every day and love).
Z-Wave vs. Zigbee
Odds are, you have Wi-Fi in your home already, and home assistant supports thousands of wi-fi devices. However, many devices use other protocols such as Zigbee or Z-Wave. To use those, you’ll need a hub (think of it as a receiver) attached to your Home Assistant device in order to talk to your switches, sensors, and other connected devices.
Z-wave’s protocol operates on the low-frequency 908.42 MHz band in North America (868.42MHz Band in Europe). Odds are, your phones, laptops, tablets, game consoles, etc. all use Wi-Fi, meaning there’s a lot of conflicts using the same frequency (2.4Ghz/5Ghz/6Ghz).
The advantage of Z-wave is that it won’t conflict with any of your wireless devices in your home. In addition, it has very high range due to it’s low frequency, which also means it can penetrate walls fairly easily (in most cases). Lastly, Z-wave devices use mesh technology which strengthens the network with more connected devices. If you’re looking for a Z-wave Hub, we highly recommend the Aeotec Z-Stick Gen5 Plus as it supports a wide variety of platforms (Raspberry Pi, Windows, Mac and Linux)
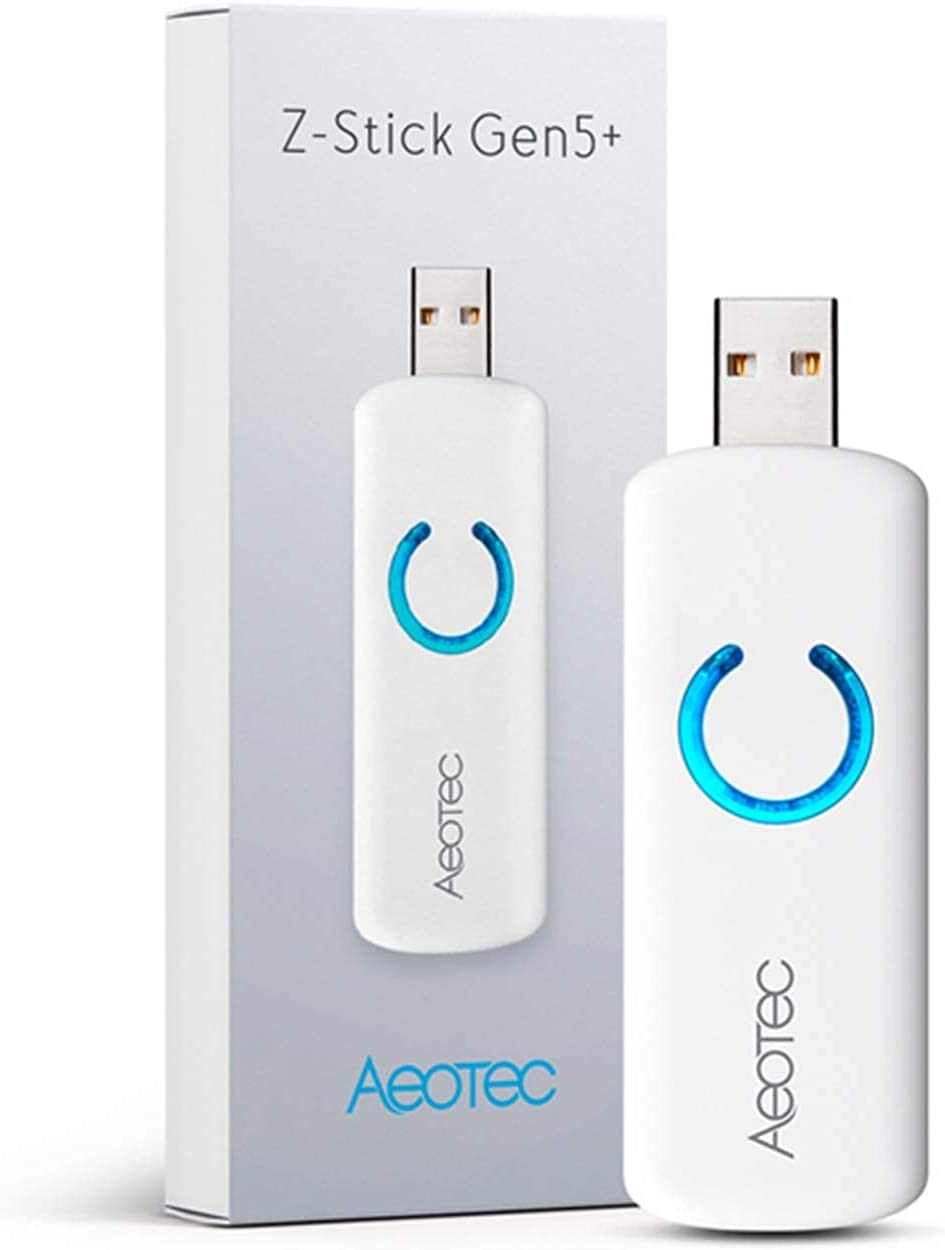
The Z-Stick Gen5 Plus from Aeotec is a plug-and-play solution for Home Assistant. It works natively on multiple platforms and it's 500 series chipset is supported by hundreds of smart home devices.
Zigbee’s protocol is similar to Z-wave in that is uses a wireless mesh network with low latency communication, however it operates at 2.4Ghz for most devices. When deploying Zigbee and Wi-Fi networks in the same environment, channel planning for peaceful coexistence is important.

The large advantage to Zigbee is cost. Zigbee devices are much cheaper than Z-Wave devices by up to 50%. If you end up deploying many devices in your smart home, you may end up saving a lot of money by using Zigbee. This is an important consideration to make when designing your smart home, especially if cost is a priority. If you do choose to use a Zigbee hub, we highly recommend the SONOFF Zigbee 3.0 USB Dongle Plus Gateway as it’s compatible with Home Assistant out of the box, and has a dedicated 20dBm output gain antenna to increase range to your connected devices.
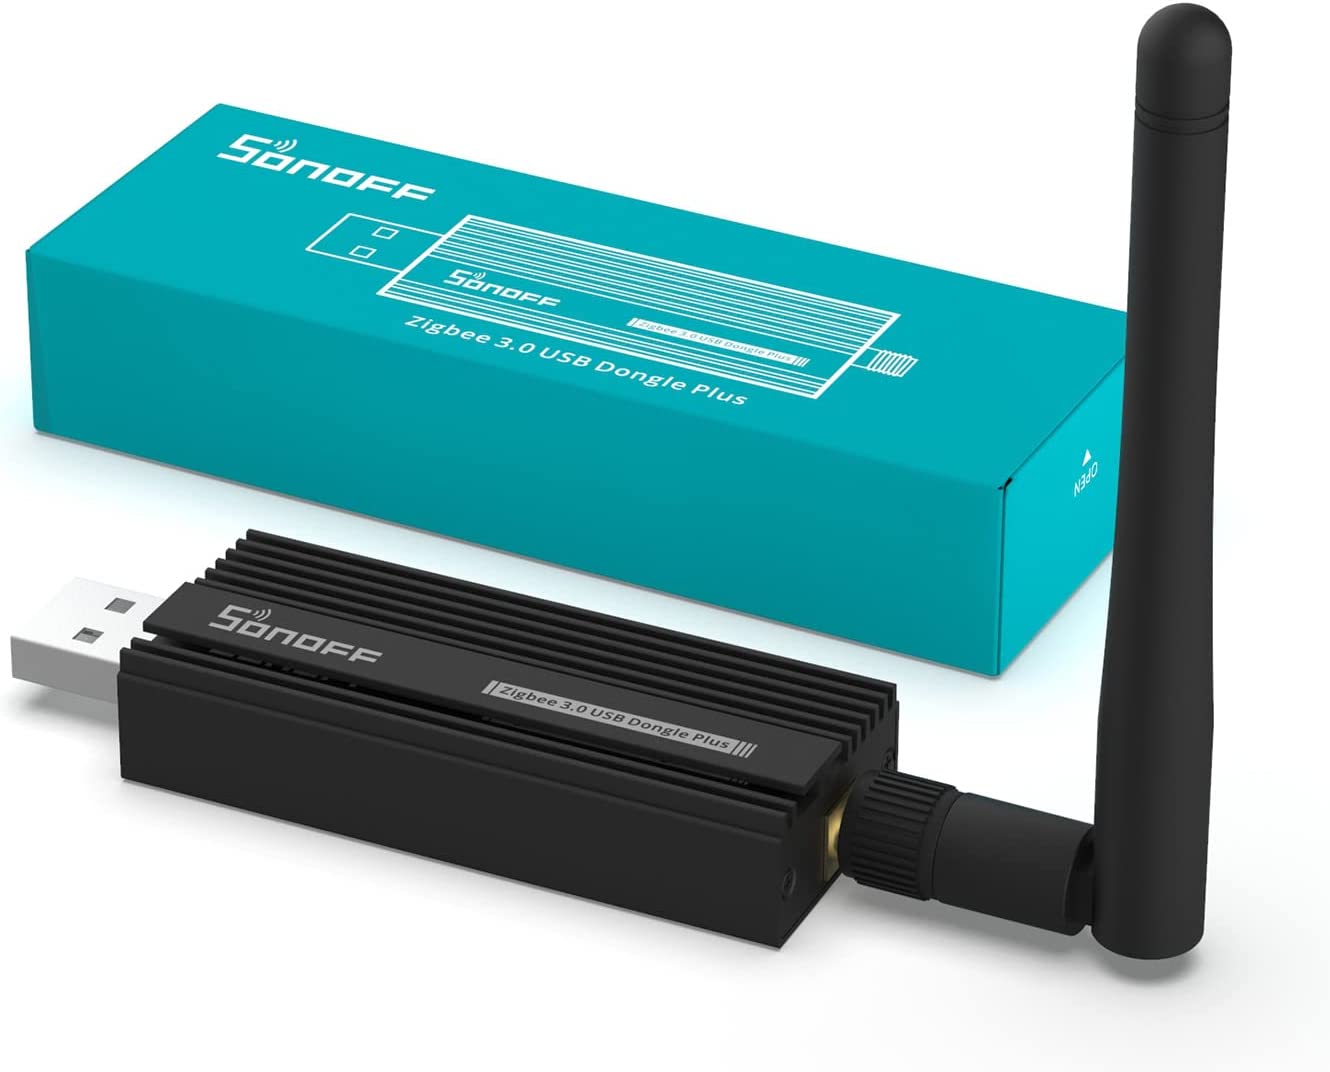
This Gateway works natively with Home Assistant on multiple platforms and is compatible with hundreds of Zigbee devices available on the market today. It is very affordable and easy to install.
Adding Devices
When it comes to integrated hardware or devices, the sky’s the limit when it comes to Home Assistant. You can set up alarms, sensors, switches, thermostats, voice assistants, blinds…and much more. One of the most popular (and fairly easy) devices to get you started are light switches.
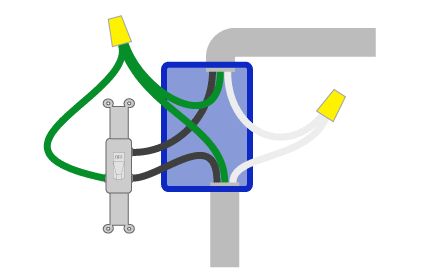
If your house was built in the mid-1980s or later, you should have neutral wires all over your house (in light switch boxes and outlets), which gives you many options regarding light switches.
If you decide to go with Z-Wave, the Zooz 700 Series Switches are one of the easiest to install, communicate very quickly with the light they’re controlling, and have excellent range. If you decide to use a 3-way switch with them, you only need one of the switches to be smart, which makes it a better deal all around.
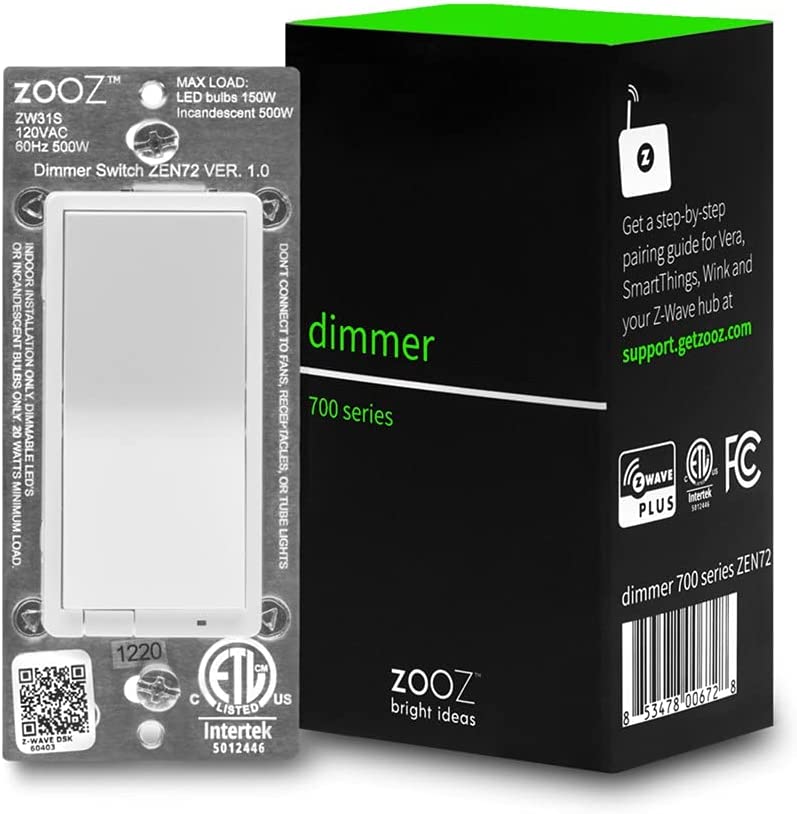
The Zooz 700 Series Z-Wave Plus Dimmer switch works in both 2-way and 3-way configurations and responds instantly to button presses both locally and remotely. It works natively with Home Assistant and is very easy to install.
If you have a Fan and Light switch in the same box, you can combine the two using the Zooz Double Switch which has an integrated dimmer as well.
If you do not have a neutral wire in your home however, that does limit your options, but there’s still hope! No-neutral dimmer light switches work by never actually turning “off” your switch. Instead, it just dims down so low that the switch itself still has power, but the lights do not. One option we recommend if this is your scenario is the Lutron Caseta Wireless Smart Switch. It’s a dimmer switch which does not require a neutral wire. It supports up to 150W dimmable LED/CFL lights or up to 600W Incandescent lights.
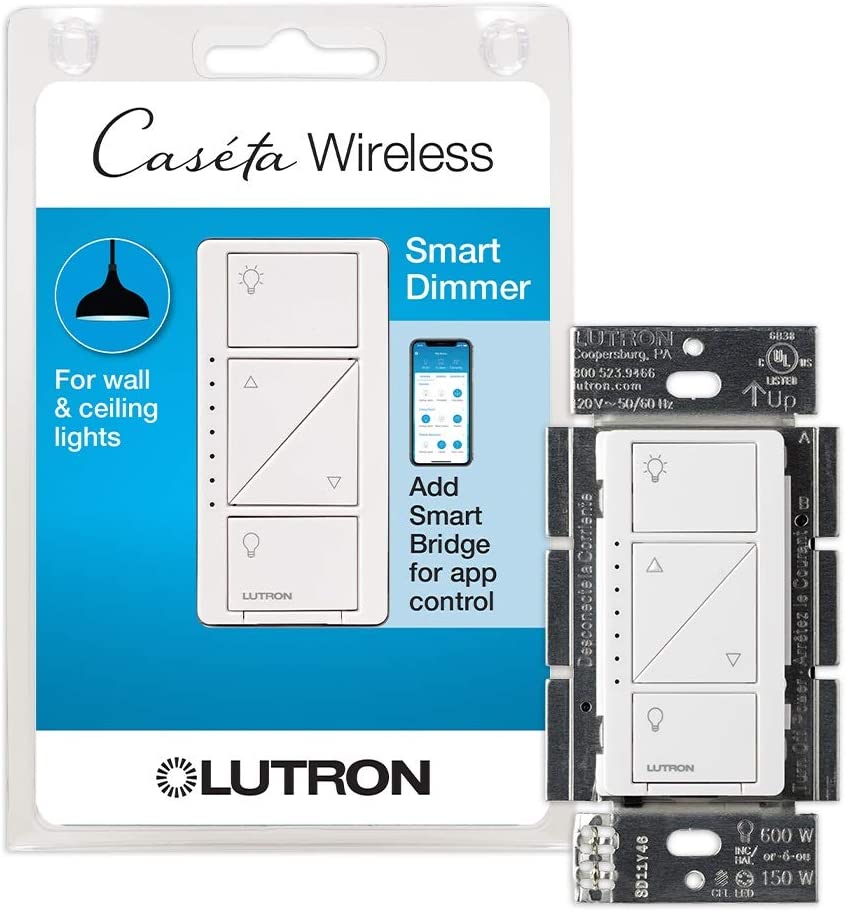
The Lutron Caseta Wireless Smart Switch has dimmer control and is intended for both wall and ceiling lights. It does not require a neutral wire, so if your home is older, this switch will work perfectly for you.
Creating Automations
Once you get some devices set up (e.g. lights, motion sensors, etc.) home assistant allows you to set up automations within the UI. For example, let’s say you just added a new smart switch that controls your outdoor lighting and you want to turn them on at sunset. Home Assistant makes that incredibly easy. First, you’d add your “trigger” event (which in this case, is a “sun” entity that uses your local data to determine when the sun rises and sets in your location).
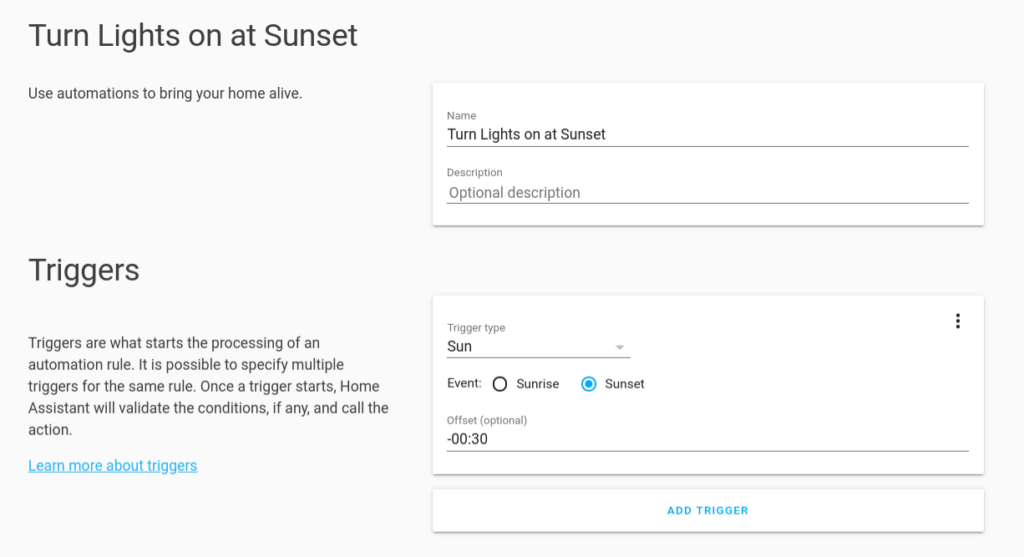
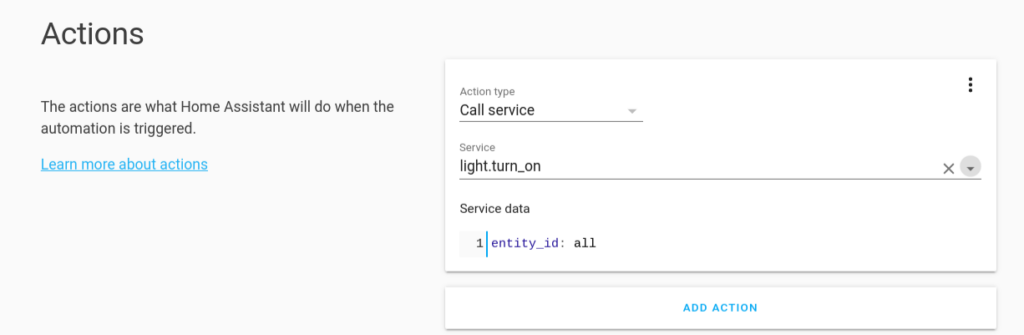
Then, you end the automation with an “action” to turn on that light as a result of the sun setting. While this is a simple example, it is the first step towards more complex automations.
Once you get a variety of devices set up, Home Assistant can integrate them all together, using timers, motion sensors, lights, alarms, etc. And, the best part is that they can all talk to each other, regardless of brand. They don’t need to “work with google” or “work with Alexa”. Because Home Assistant is open source, integrations span far and wide into most brands and styles of “smart” devices, making it easy to make your home into a DIY smart home.
Conclusion
This is far from the end when it comes to building a DIY smart home, as we have merely scratched the surface. All of our writers at Techsauce use Home Assistant and absolutely love it for it’s flexibility, vast integration library, and unlimited customization. One great feature of Home Assistant is that you can create your own dashboard.
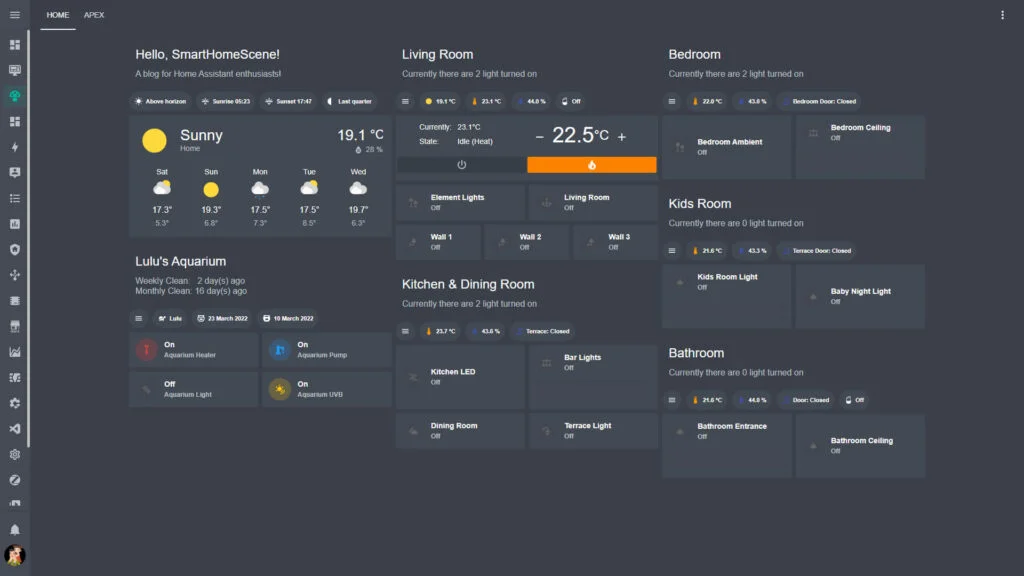
You can also create automations with your switches/sensors that forego a home dashboard, but the choice is entirely up to you. We certainly plan to talk more about Home Automation and DIY Smart Home topics in the coming months, so if this interests you, we’ll certainly have more to share.